Transform Your Supply Chain Planning and Marketing Strategies with Google Cloud and SAP Integration
Transform Your Supply Chain Planning and Marketing Strategies with Google Cloud and SAP Integration
May 28, 2021 | Ajay Gowda
Blog / Containerization and Deployment in Just 10 minutes!
This blog talks about Why Containerization, What are containers? Why Containers?, Benefits of Containers, Deploying a Containerized App in Google GKE(Google Kubernetes Engine).
Containerization allows developers to move fast, deploy software efficiently, and operate at a pioneering scale.
In ancient times, we used to develop monolithic architectures, where each piece of the application is intertwined from Input-Output to the data processing to rendering, making it a cumbersome process. Containers work best for microservice-based architectures. Separation and division of labor allow services to run continuously even if others are failing, keeping the application as a whole more well-grounded.
A container is a standard unit of software that packages up code and all its dependencies so the application runs quickly and reliably from one computing environment to another.
Google Cloud Platform provides the well grounded and easily managed Kubernetes clusters, as Google is the creator of Kubernetes and donated it to the open-source community.
Below, we’ll start our process by creating some containers for a microservice application in the Google Cloud Platform. You’ll need a GCP account to continue. Keep in mind that, if you are completely new to GCP, GCP’s free tier gives you $300 credit.
The kickoff step in deploying a containerized app is setting up a CLI environment in GCP. We will use Cloud Shell to do this, since it already has installed and configured Docker and kubectl. Besides, the CLI already runs inside the GCP console where you can access your resources and check their statuses.
Open the Google Cloud Console, and click “Activate Cloud Shell” on the top of the navigation bar.
A terminal with a command-line prompt will open as follows:

In Cloud Shell, clone the source code of the sample application:
Step-1
git clone https://github.com/GoogleCloudPlatform/kubernetes-engine-samples
Step-2
cd kubernetes-engine-samples/hello-app
Step-3
In this step we’ll build the container image with a tag that includes GCP project ID
docker build -t gcr.io/${DEVSHELL_PROJECT_ID}/hello-app:v1 .
Step-4
If you are using the registry for the first time, enable it in the API Library.
Authenticate to the registry with the following command, and then push the image:
gcloud auth configure-docker
Step-5
In this step we’ll be packaging and uploading the container image to the registry
docker push gcr.io/${DEVSHELL_PROJECT_ID}/hello-app:v1
Now, we can create a Kubernetes cluster and distribute the hello-app application over the cloud.
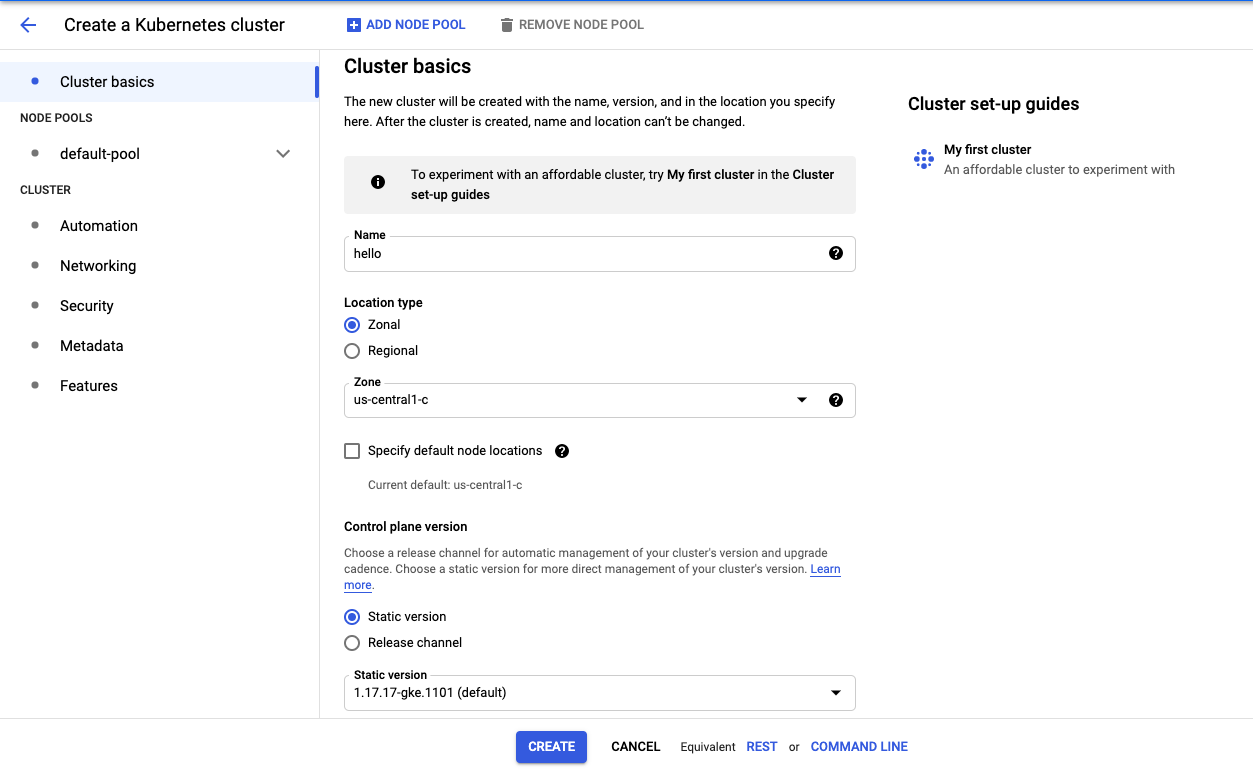
Open the Kubernetes Engine within the GCP control panel, and click on “Create cluster”:
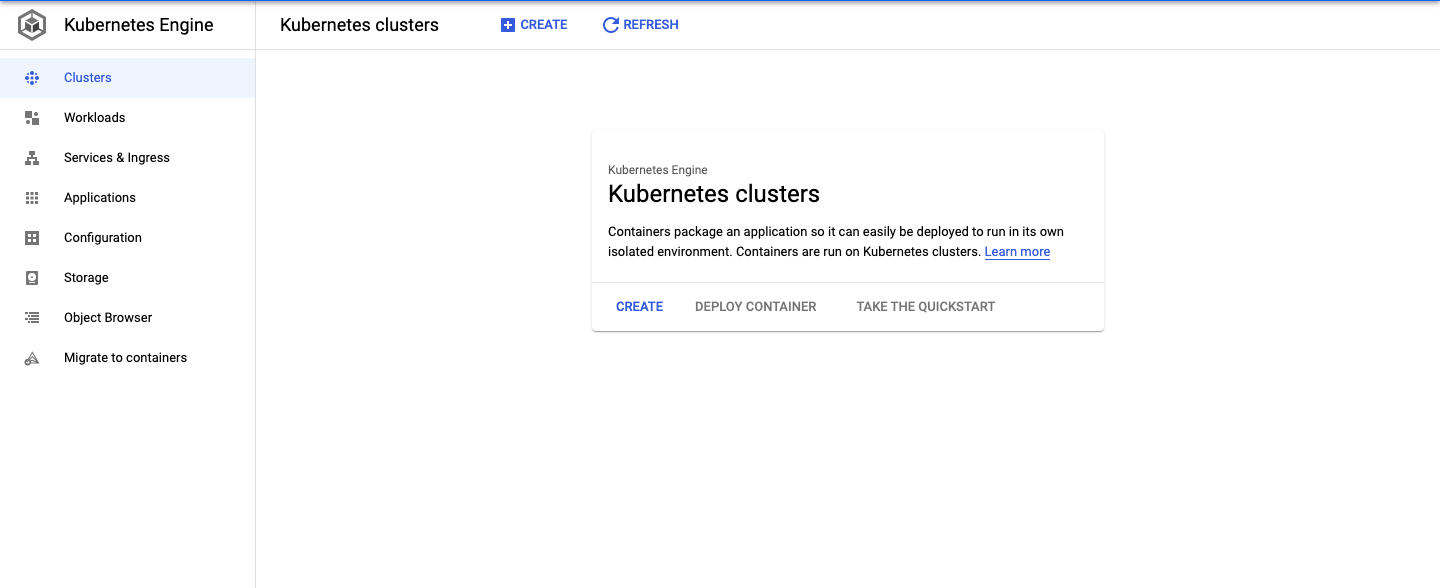
In this article, we will go with the default settings by simply clicking “Create”:
Within few minutes, a new cluster will be created as seen below:
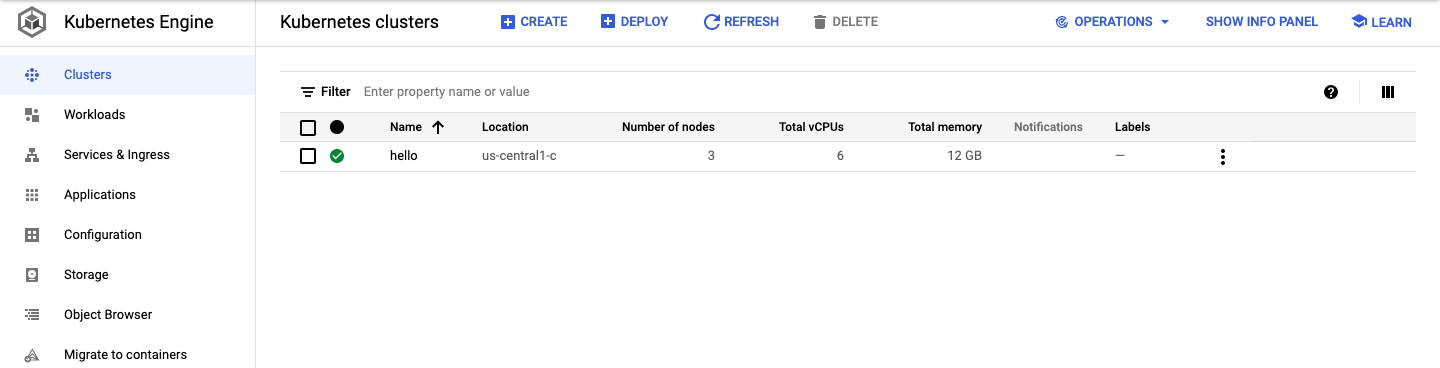
Click the “Connect” button, and then click “Run in Cloud Shell” to continue in the terminal. In the terminal, run the following command to list the nodes:
kubectl get nodes
The default setup will create three nodes with Name, Status, Role, Age, Version.
Containers to Cloud
Create a deployment with the following command:
Kubectl create deployment hello-world –image=gcr.io/${PROJECT_ID}/hello-app:v1
The following command creates a service resource in Kubernetes, and it provides networking with an IP attached to the application instances.
kubectl expose deployment hello-world –type=LoadBalancer –port 80 –target-port 8080
Well, Congratulations! you now have a fair knowledge about containers.
YAY!!, we’ve taken our app, packaged it into a container, and deployed it to the web with Google Cloud!. Thanks to some brilliant tools namely Kubernetes and GCP the process is painless and results in flawless deployments time after time. Stay tuned for my upcoming Blogs on Docker and Deployment.
References:
Share
Enable Generative AI + Predictive AI On Your Data in 60 minutes.
Add decision intelligence into every corner of your product and operations.